|
Hi Kids, For our final Lesson, I have painted a Narwhal! They are fascinating marine mammals, and I have included some fun facts. No worries if you don't have paint. Just draw your narwhal on paper and color with markers, crayons, or color pencils. Painting will require heavy paper or canvas. I used acrylic paint but water color will work as well. I have really missed you all, and I am looking forward to seeing y'all again when school resumes. Have fun for now and hope y'all have a wonderful summer! Mrs. Ginger
Fun Facts about Narwhals
0 Comments
Hi Kids,
This week I decided it would be a great time to do a patriotic op art lesson. Op art is short for optical art, which is an abstract art form using optical illusions. What an awesome time to do some patriotic art to show our love of the country! We have all come together to help others during this unusual time in our history, especially our first responders and healthcare workers. We also have Memorial Day and the 4th of July coming up. I think I'm going to hang mine in a window so everyone can see it. Directions for the artwork: First Trace your stars with a pencil onto white paper turned horizontally, or Draw the stars Freehand. I am including star patterns if you want to use them. Use however many stars you like, and put them on the paper wherever you think they look good. Next, you will divide your paper up into equal-sizeD horizontal stripes using your pencil. You can Use a ruler to help with this. I used a 9 inch X 13 inch sheet of construction paper and made 9 stripes, each 1 inch wide. If your paper is a different size, you can ask your parents for help getting the stripEs even or just "eyeball" the stripes yourself. You can also use a different number of stripes if you like. Next, figure out the pattern and start coloring! Start By Making a red stripe At the top of the paper, But Don't Color inside the stars. then go back and color the part of the star inside the red stripe Blue. Then make the next stripe white and color the Part of the star inside that stripe red. Now you have your pattern and you just repeat. Take your time and have fun! Ms. Ginger
Hi Kids,
This week's Online Art Club lesson is "A Day at The Beach"! It is one of my favorite scenes to draw because I grew up near the beach in Charleston, SC. I used colored pencils but as always you can use whatever Art Supplies you have on-hand. Have fun and be creative by adding different things you love at the beach!
Hey art club kids. I miss you all very much! Here is another awesome Byrdhouse Online Art Club Lesson for you. Meet Peter the Painter! I used a pencil to draw my bunny and crayons to color my artwork, but you can use whatever you have on hand. Be creative and colorful. I hope you enjoy this Springtime art project. Stay well and have fun! - Ms. Ginger
Hi kids, hope you are all doing well and enjoying time with your family. I hope your online learning is going great and you loved the bee project. I have another wonderful Byrdhouse Art club online project for you, "Snazzy the Snail". I used a #2 pencil to draw my artwork and then colored Snazzy with colored pencils. You may use whatever you have: markers, pencils, crayons, etc... I have made you a cool video this time to help! Remember your artwork doesn't have to be exactly like mine. You can add your own colors and patterns. Hope you have lots of fun with this project. Enjoy! Mrs. Ginger :-)
Hello Awesome Art Club Students! I hope you are ALL WELL & enjoying time with your family. I really miss all of you and hope to see you soon. I have created an awesome project for you to work on at home! "The Happy Bumble Bee" project is a great way for you to create awesome artwork using Key elements of art: line, shape, and color. Bees are so important to helping our world Because they are pollinators! Without them, many of our plants could not produce seeds. You can use the supplies you have on hand for the project - Any type of paper, a sharpie marker, color markers, color pencils, crayons, pastels, etc. i'll send you another project next week. I hope you Enjoy and have lots of fun with it! Bee creative! 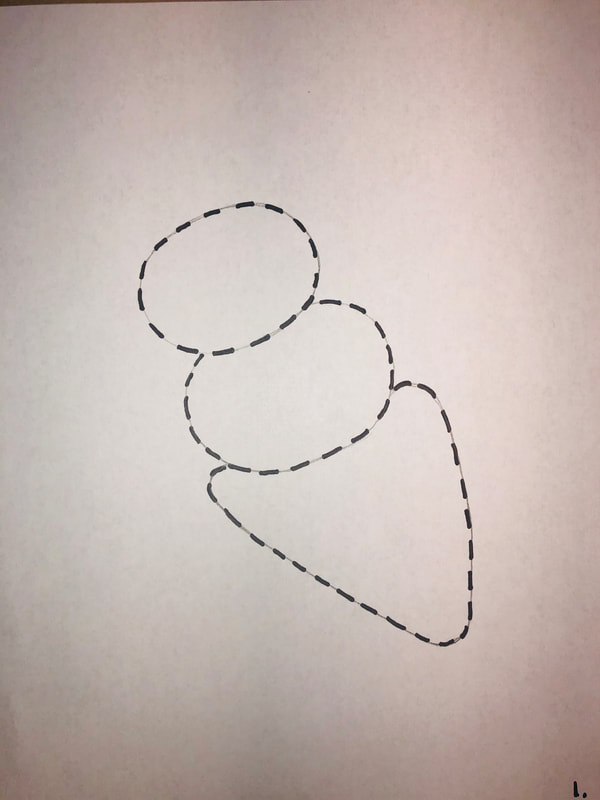 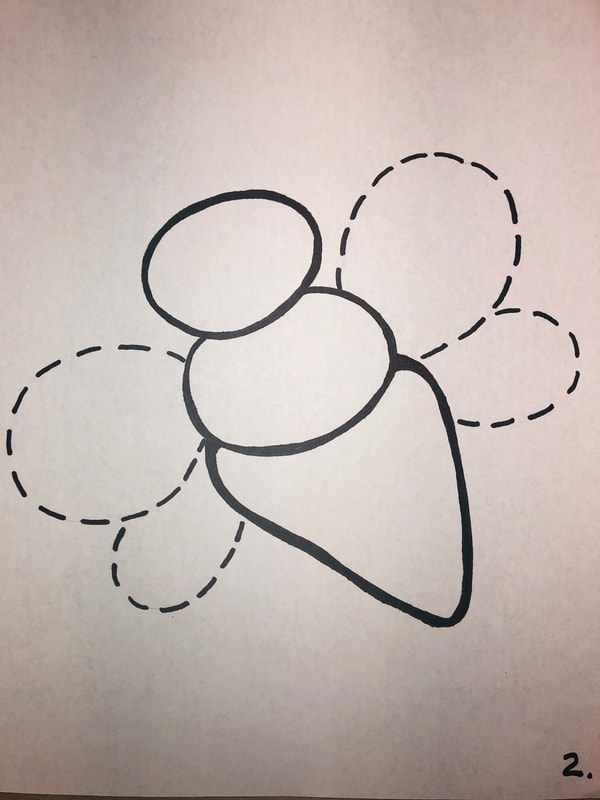 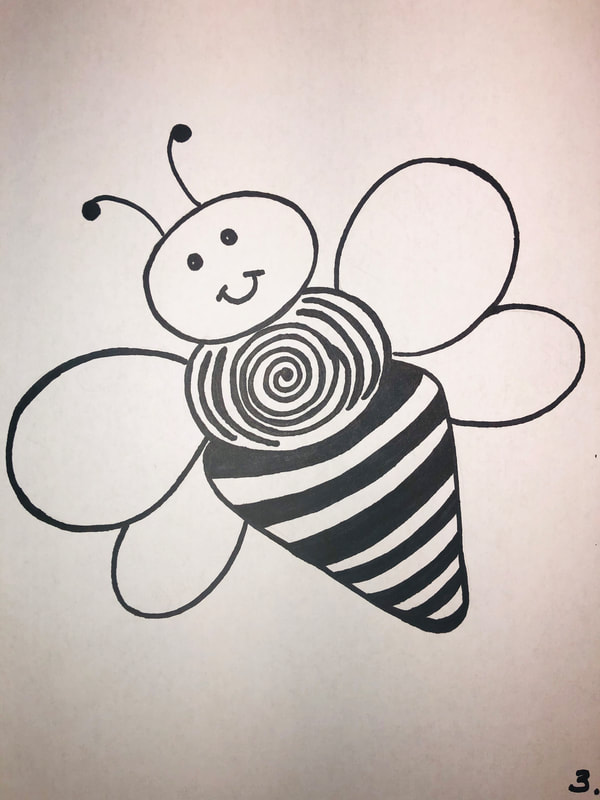 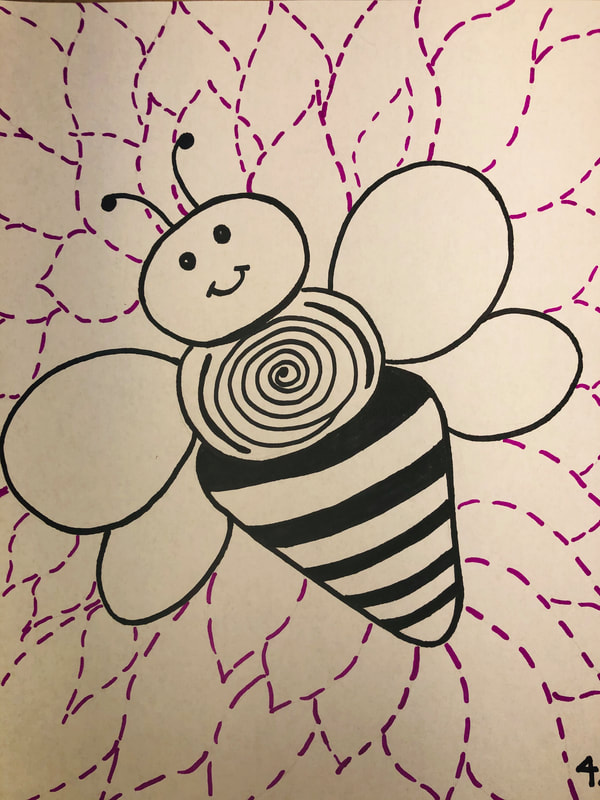 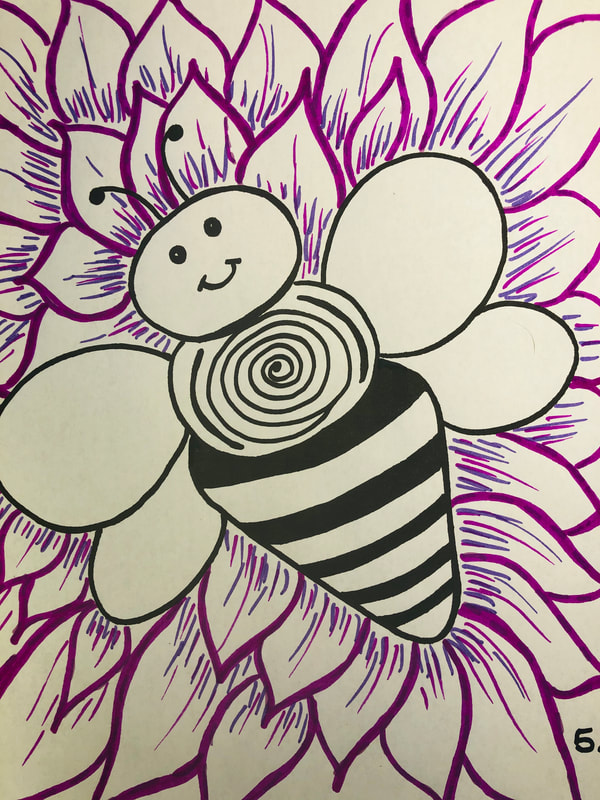 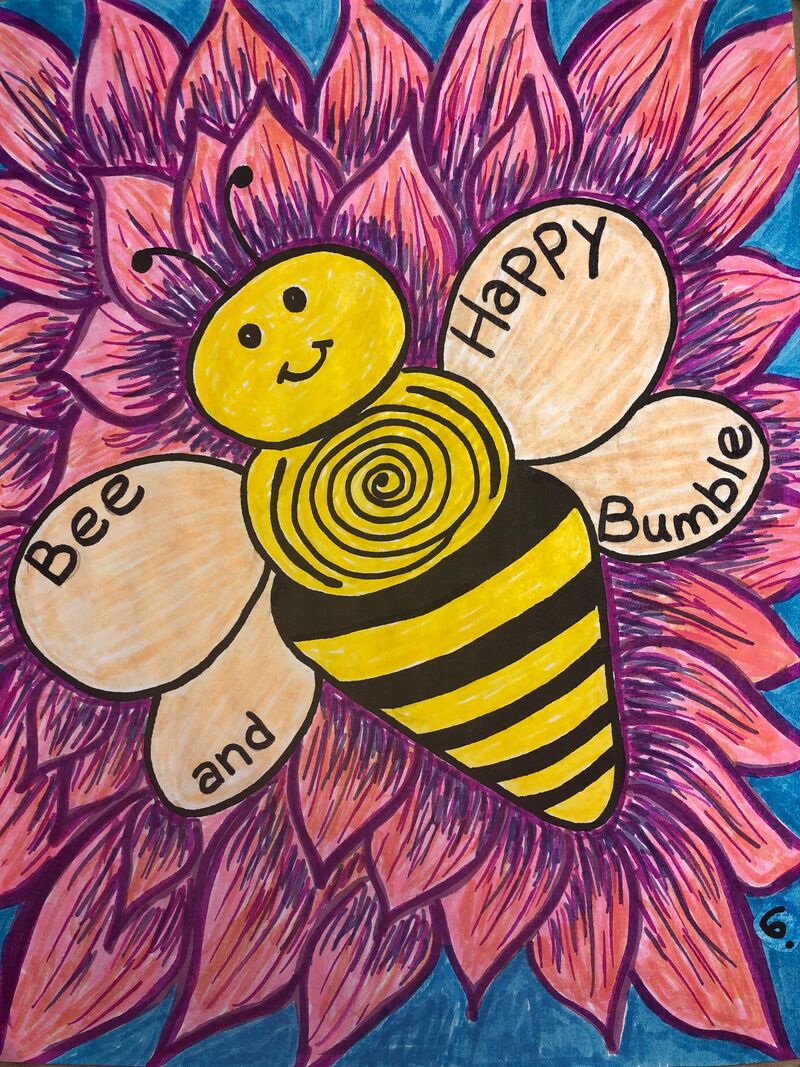 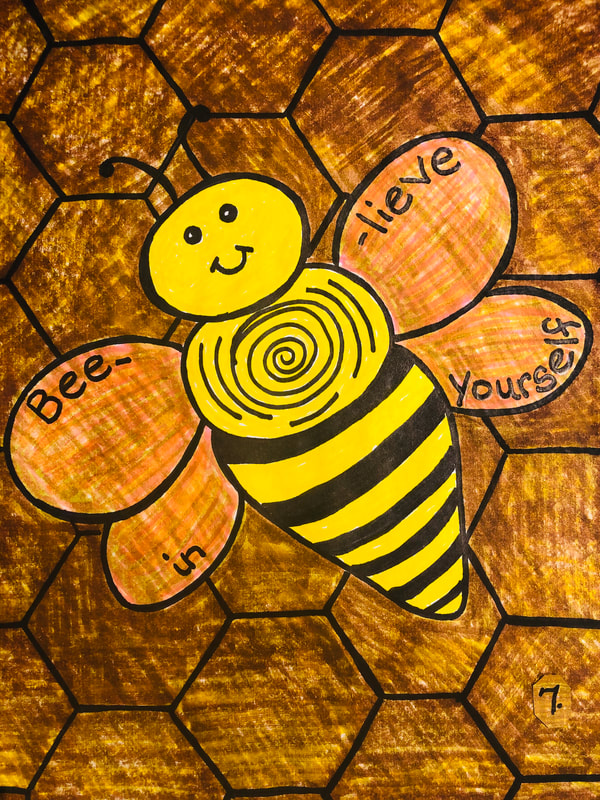 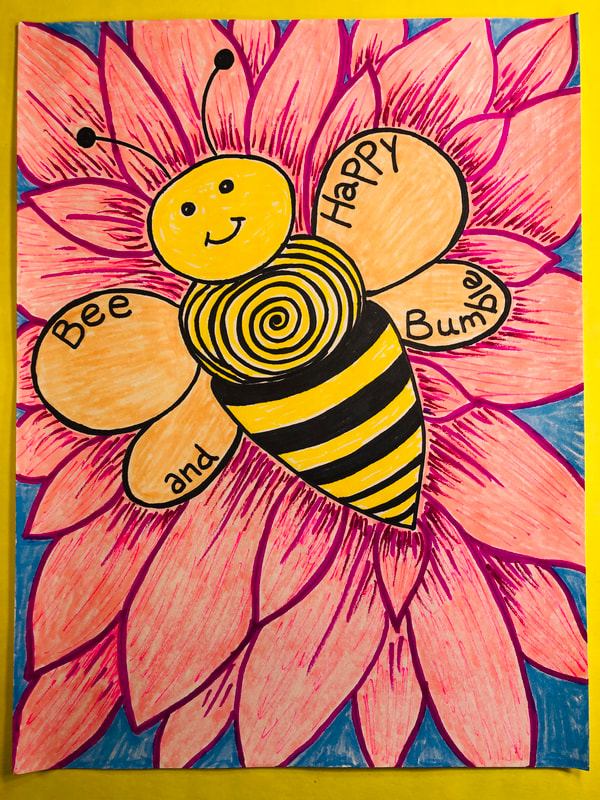 1. Draw the bee body using the basic shapes of an oval and a cone.
2. Add the wings using oval shapes . 3. Add the details to the face, body, and head. Include things such as eyes, mouth, antenna, spiral, & stripes. add your own decorations TOO! be creative. Remember to leave a white highlight in the eye. 4. start to add a flower background by layering pedals. If you would rather use a honeycomb background, a finished picture of that is included too. 5. Add details to background such as dark lines at the base of the petals. 6. Add lots of color. I created a cool color blue sky with contrasting warm colors for my petals. Remember to layer your colors. Write a "bee" saying on the wings. 7. THis is the alternate Honeycomb background. 8. This is an Alternate COlor Flower Background. |
Archives
May 2020
Categories |
||||
 RSS Feed
